Showing posts with label raleigh twenty project. Show all posts

Monday 25 June 2012

Spa Cycles Wharfe Saddle, Seatpost Raleigh Twenty/BSA20

The Wharfe saddle from Spa Cycles is rather like a Brooks Swift...and a lot cheaper. This is what you get inside the box:
A little tool for the nose bolts, and a cloth bag to put it in. I fitted it to a new alloy seat post for the BSA 20, and added a Carradice Zipped Roll saddlebag:
It's quite a 'racy' saddle, and I wonder if I'd have been better off with the Nidd which is like a Brooks B17. We'll see, time will tell. 
Apart from improving the appearance, the new saddle n post saved nearly half a kilo in weight:

Old (g)New (g)
Saddle:910525
Seatpost and clamp:470380
Totals:1380905


Wednesday 20 June 2012

BSA 20, Raleigh Twenty clone

Since my beige colour Raleigh folder is with a cousin for use as a commuter, I recently picked up another bargain. It's a green, non-folding BSA 20 and this is how it looked on purchase:
The hub stamp and frame number indicates its an early 1978 model. That's the year of the film Grease, the hits Night Fever by the Bee Gees and Baker Street by Gerry Rafferty.

I've yet to decide what to do with it exactly. As I've been saying for many years, the Raleigh Twenty to a bike nut, is like a blank canvas to an artist. So far, I've merely pumped up the tyres, changed the rear brake inner cable (it was jammed with corrosion), oiled the hub, adjusted the toggle chain and generally lubed all round. Oh, and I did spend a fair amount of time unravelling a great deal of yellow knitting wool that I found wrapped around the rear hub and drivetrain. That's a new one for me!

Anyway, now I have a fully working, pottering bike for the grand sum of £15, plus cost of an inner cable.

So many possibilities... Perhaps I should start off with a strip and powder coat?

Saturday 5 March 2011

Raleigh Twenty: Sturmey Archer Hub Gear Cable Adjustment - Indicator or Toggle Chain

People have asked me how to adjust the gear cable on a 3 speed Sturmey Archer hub. Indeed, some folks are a bit perplexed by the dangly chain bit, knurled parts, and the somewhat "mystical" operation of the whole affair. This sequence of photos attempts to explain cable adjustment in easy steps. So, assume you've picked up a Raleigh 20 or other bike with a 3 speed Sturmey Archer hub gear. This one is from 1980 (pictures in a previous blog). I'm also going to assume that the short chain part shown below, called the "indicator", is the right type for the particular hub. Why it's called an indicator will become apparent later.
First step is to loosen the knurled nut at left in the photo above (untwist it a few turns). Then undo the knurled tube connector (far left in the photo above). Once disconnected, carefully take the plastic cap off the axle nut, to leave what's shown below:
Now, the dangly chain part is the indicator. The part on the left still attached to the cable is what I'm calling the knurled tube connector - it's also called a "barrel nut". Grab the indicator by the chain, lift it gently (upwards in the photo) and untwist it carefully from the hub. Hopefully, it will be free to turn. Take it out and clean it up using, degreaser or whatever you like really.

It's worth looking at it carefully - see below. The tip (top right) is shaped into a cone - this is to assist when screwing it back in. Then there is a uniform rod, the chain, the threaded part on which runs the knurled nut and the knurled tube connector (not shown in the photo below):
Grease both threads. Oil the chain links. Put the gear thumb lever in 3rd (top gear) in order to slacken the cable. Then insert the tip back into the hub and tighten it very slowly and gently. When you feel it become just hand tight, then unscrew it by half a turn - no more. Put the plastic cap back on and tighten the knurled tube connector back on to the threaded rod of the indicator. A few turns is fine initially. Now put the thumbshift lever into 2nd gear. It looks like this:
Look through the viewing hole in the axle nut and you can see that part of the uniform rod is showing. Meaning that the rod is jutting out from the end of the axle tube. Now, the aim is to get that uniform rod end LEVEL with the end of the axle tube. Turn the knurled tube connector one way, and see what happens:
In this case, the rod has come out even more - see the yellow arrow above. Now you can see why it's called an indicator, and what the viewing hole in the axle nut is for. So, turn the knurled tube connector the other way...
In the photo above, the rod has gone inside the axle tube. Remember, you want it level with the end of the axle tube. Just to reiterate, the thumb shifter must be in 2nd gear while you do this adjustment - which is in essence cable length/tension. Keep twiddling the knurled tube on the threaded rod until it is level, like this:

Now spin the pedals a few times, change gear up and down and back to 2nd, and re-check that the indicator rod is level with the axle end. Then tighten the knurled nut against the knurled tube connector, to lock down the cable length and replace the plastic cap, thus:

Go ride! It should all be hunky dory now, and shifting should be fine. If not, it probably means that the indicator is not the right one for the hub. You can sort that out by getting the right one from a good supplier, like Oldbiketrader, or if not, then you have to adjust it by careful and gentle testing. If you end up having to go through the testing route, remember that the cable should not be too tight in first gear - you may feel too much tension at the thumbshift lever - and gears should change smoothly, with no free-spinning in second. You should be able to see the uniform rod on the indicator moving in and out as you change gears. That indicator is also known as a TOGGLE CHAIN, and here's a great site for cycle touring and hub gear afficianados:
The planetary hub gear was a wonderful invention!

Thursday 16 December 2010

Tyres: Raleigh Twenty 20, Shopper, Stowaway, Triumph 20, BSA, etc

Most Raleigh Twenty bikes had ISO 451 diameter wheels. Despite the 20 name, this is closer to 21" than the common 406 BMX size wheels. So, is there a decent selection of modern tyres to fit the Raleigh Twenty wheel (451 diameter)? I've been looking out for them and here is a list (if you know of further ones, please post a comment with details - thanks!):

KENDA
- Kompact (hard packed race)
- K-West (road, commute)
- Small block eight (photo left: hard packed race and trail, well regarded by MTB and cyclocross riders)

MAXXIS
- Drop the Hammer (hard packed race)
- Holy Roller (pavement and hard packed race, staggered block pattern, see photo below)


PANARACER
- Minits Lite (fast road, commute, baldies pictured at the end of this post)

PRIMO
- Comet (fast road, commute)
- Champ (file tread)

RALEIGH
- Record (traditional)
- Shopper (traditional)

SCHWALBE
- HS110 (traditional style)
- HS371 Mow Joe (knobbly, photo below)
- HS377 Road Cruiser (heavy touring, 457, not 451, but would probably work)
- HS399 Durano (high mileage road)


SHYH HWA
- Traditional style 37-451 (SJS Cycles ebay shop)

TIOGA
- Powerblock (bmx racing)

Most of these are either 28-451 or 37-451. You can get full details from the manufacturer's websites. As to retailers, you would have to search around, for example: Chainreactioncycles, SJS cycles, Winstanleys, Dereks Cycles on ebay, West country recumbents and Mailorderbikes, to name just a few.

Rejoice in your rubber!

Chuck

Saturday 30 October 2010

Renovating a Raleigh Twenty Again: Part 1 - "new" machine

UPDATE Feb 2012: I've given this vintage Raleigh Stowaway folding bike (Raleigh Twenty style) away to a relative for use as a commuter. Eventually, when it returns, I'll strip it and get it powder coated probably in DARK PURPLE....lovely...

For a paltry sum, I picked up another Raleigh 20 folder. This time she's a yukky beige STOWAWAY. Frame number and hub stamp indicate that she was made in Nottingham in the Summer of 1980. This was the time of Blondie (Call me), Michael Jackson (Off the wall) and Pink Floyd (The wall). Lots of photos below:


Tuesday 3 August 2010

Renovating a Raleigh Twenty: Part 6 - Headset, nylon bush & handlebars

The infamous nylon headset bushing. (For a general description of the headset and a quick service, see this post). Instead of a top race, this is what the Raleigh Twenty uses for a bearing at the top of the head tube. The bottom end has ball bearings - there are photos of that below.
This is the rear view of the nylon bushing. Note the cutout in the steerer tube that allows the steerer clamp to grip the stem. (Photos of the original headset configuration are here). Here, the nylon bushing is being taken out. It's all really very curious. I wonder why Raleigh did it that way?
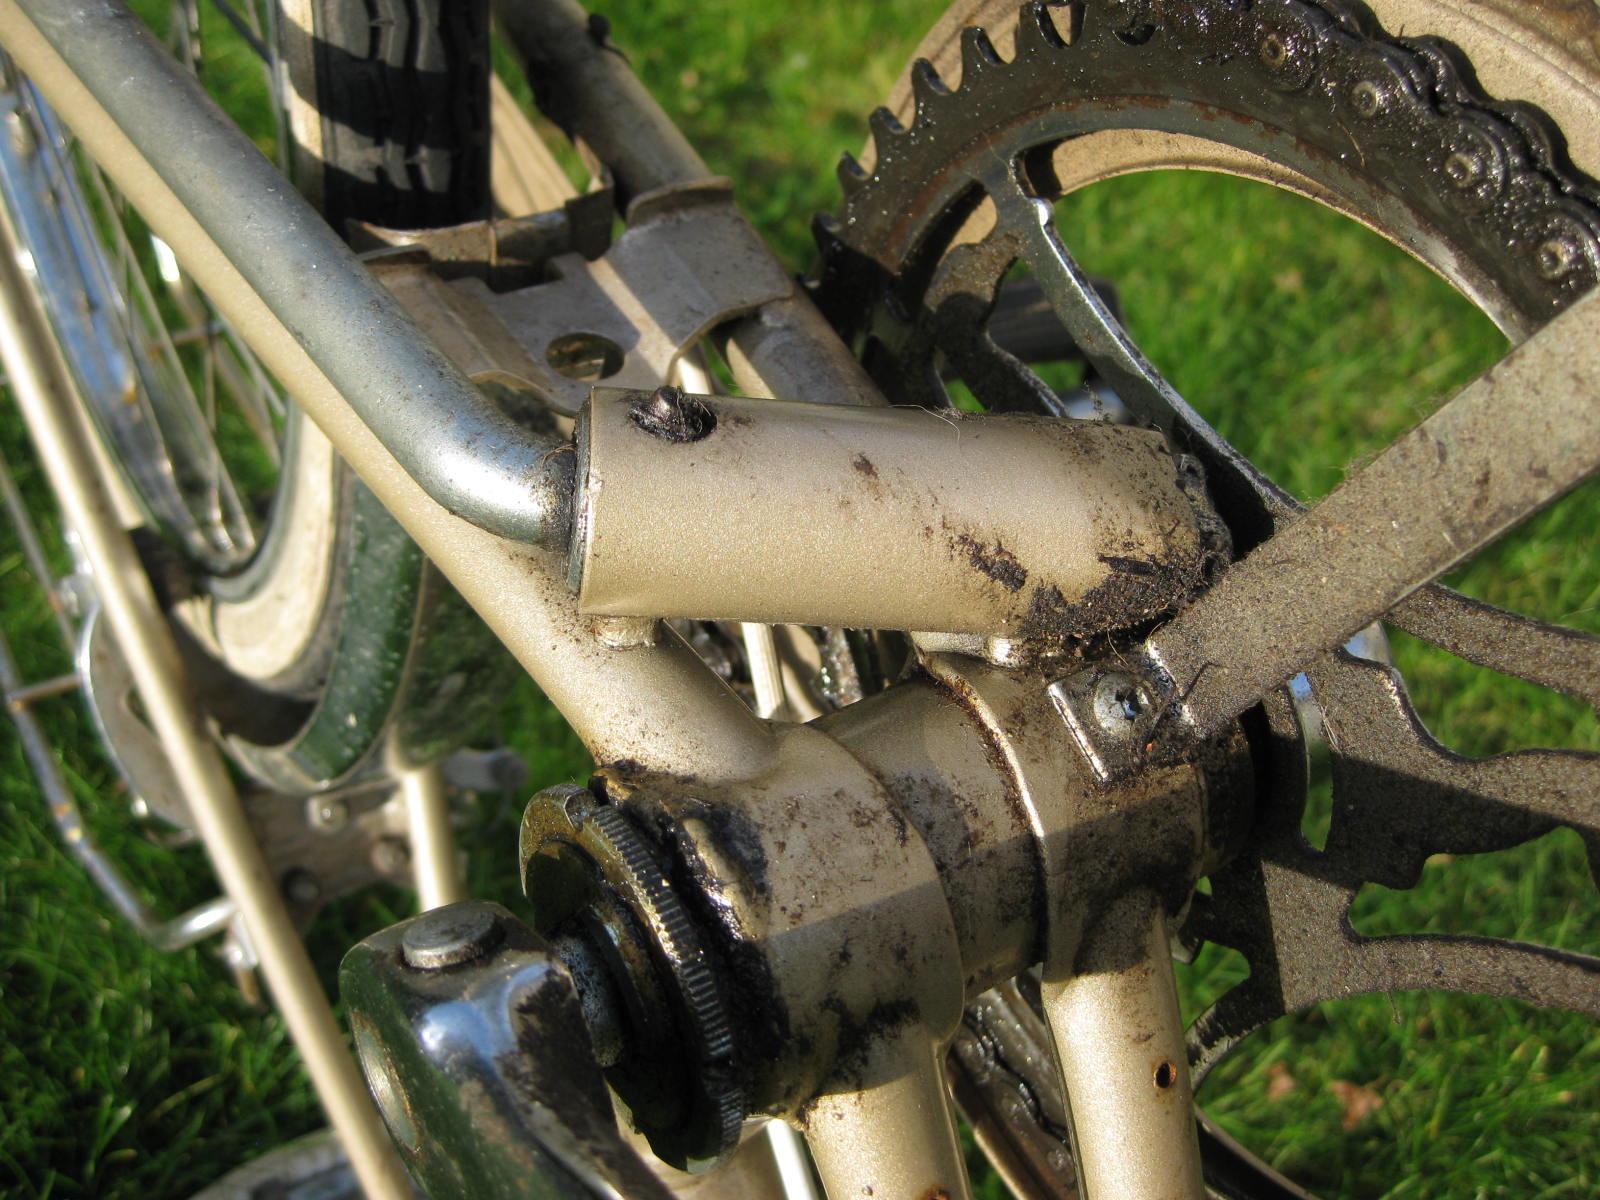
View of the cup at the other bottom end of the headtube. All greased and ready to be assembled.
New balls please! This is a photo of the balls on the crown race, all greased and ready for assembly. They are new shiny ones, 25 of 5/32" size.
I'm going to use the top half of this Madison M:Part Sport threadless headset. That will replace the nylon bushing at the top of the head tube. At the bottom of the head tube, I'll leave the original cup and bearing arrangement, because it's absolutely fine.
Just one spacer above the bearing cap, then the original lock nuts, turned carefully to apply the right amount of pressure - so that the forks rotate freely with no tightness or binding, and no play in the headset either.
Here goes the new stem. It's an alloy quill with an adjustable alloy stem with three bolt handlebar clamp. Madison M:part again. Titec Hell Bent alloy bars, with a small rise.
The bars were too wide, so I had to saw the ends off (to ~56cm total width). Simply filed the ends off after cutting with a junior hacksaw.
Ta Da! The bike, now even more transformed to the 21st century. The difference that the headset makes to the ride quality is amazing. It's now really responsive, but at the same time stable. I can ride hands off. Previously, you had to apply positive force to the bars to turn. Now you can "think" and lean the turns, just like a "proper" bike! In fact, it feels MUCH better to ride now than my commuting Dahon Speed D7 folder. The Triumph Twenty is a small bike with a big bike's personality!
View from the driving seat. Tioga Power Stud bar ends, give a welcome change in hand position. Trigger shifter is in easy thumb and index finger reach (as is the bell!). Swanky new, but oh so cheap, brake levers. Brakes are really good now, even the back one is not bad, despite the original sidepull caliper and pads. They will improve further when I replace the steel rim with an alloy one.
Looking good. The main work left now is to replace the rear steel rim with an alloy one, just like the front wheel. I'm still musing over the mudguards. Should they stay or should they go?
Proudly sporting the Triumph head badge. Actually, that is the main reason that I didn't want to send it off for re-spraying or powder coating. I couldn't figure out how to take off the head badge without damaging it. It seems to be riveted in place (three rivets I think). Awkard to reach the back of the rivets inside the head tube.
Very satisfying to reach this far, with no hitches along the way. She really is a lovely bike to ride now.
UPDATE: 22 September 2010
Days after the above blog post, she moved to a different town to be used as a commuter by a student cousin of mine. So I won't get a chance to replace that rear steel rim for a while. Meanwhile, my 8 year old son has implored me to buy another one and to keep the old steel bars (because they were "cool" and "retro" - he's EIGHT for goodness' sake!). By all accounts, in virtually daily use, she has been completely reliable thus far.