Monday 5 April 2021

Fitting Shimano Di2 Electronic Ultegra gears to a Lynskey Titanium frame

 At the opposite extreme to a 1978 Raleigh shopper, is this swanky thang from Tennessee:

It's a Lynskey R300 road bike, to which I'm going to fit Shimano Di2 Ultegra (6870, so an older version of the groupset, but it's still totally brilliant!). Now, the challenge is that at each bulkhead in the frame, the passage holes are smaller than the tubing. That means, there's a lip around each junction, which makes it awkward to thread anything through. The photo below of the bottom bracket may show this better than my explanation:

There are 6mm exit holes, but these are ok to work with, and standard for Shimano grommets. Here's the one in the head tube (and yes, Lynskey did confirm that the electronic wire (connecting Junction boxes A to B) is intended to go in from this hole around the steerer and into the down tube:


And here's the hole on the chainstay, which I will be wiring up first:

My "threading" wire of choice is an old gear cable, also shown in the photo above. I like using this, as it can be taped easily to the electronic wire plug and still fit in the 6mm hole and pass round tight corners. I'll show you how later. But, the first step is to get this gear cable into the chainstay, with the nipple at the cassette end.  After thinking about it, I fashioned a hooky type tool out of wire:

One end is a shepherd's crook, the other is a simple L hook and the middle is a loop. So, I ended up using this tool quite a lot today! First job then is to use the shepherd's crook to lift out through the chainstay hole the non-nipple end of a gear cable, inserted into the bottom bracket, like this:

Eagle-eyed readers will see that I snipped off the very end of the sherpherd's crook, to make it easier to pull out of the 6mm hole. Basically, it's like fishing - poke the gear cable with one hand, try to hook it out with the left. It's relatively easy because you can feel the gear cable touch the hook and you can sometimes see it through the hole too. Once that was done, attach the nipple end of another gear cable to the nipple end of this cable. Using masking tape, wrap them up: 


And pull the nipple end through, to end up like this:

Now we're cooking! This nipple end can then be taped to the electrical wire plug:


To create a hinged affair that can fit in a 6mm hole and go around corners. It looks like this:


Which can then be carefully drawn into the chainstay and out of the bottom bracket:


In the photo above, the first electrical wire is installed. A similar technique is used for the head tube - down tube connection. Looking in under the head tube, you can see the gear cable inserted into the entry hole for the down tube:

The gear cable comes out of the BB to the junction box:

The wires going from the seatpost battery to the bottom bracket, and the front mech to the bottom bracket are much easier. And from here, it is quite fiddly to get all your electrical wires where you want them AND to insert the junction box into the down tube, leaving enough space for the bottom bracket itself to be installed. By the way, for this Lynskey recommends copper ease anti-seize and also to PTFE tape the threads on the bottom bracket bearing units. Certainly, I took my time, used lots of patience and avoided frustration by thinking carefully about every step before executing it. 

It shifts like a dream and rides like a magic carpet! Here are some photos of it (I'll cut the steerer down later, after I've settled in on a riding position).


Thursday 1 April 2021

Chuck's Tech Opinion: How to decide what to keep and what to change on a Raleigh Twenty, and Pedals!

As you work on a Twenty, you start to get a feel of the engineering. I find it useful to categorise: some parts are really well thought out and function well, others are merely adequate for their job and there's another category of redundant, useless, or poorly designed stuff. Then layered over that, some parts have elegance, possibly even beauty, while others are downright ugly. Add yet a further layer, namely weight, and a recipe emerges as to how to go about deciding what to keep and what to change. 

Take the pedals. In the photo below (starting top left and going anti-clockwise): originals off a BSA 20, modern MTB style polymer flatties (BBB brand) and a generic polymer trap-type pedal:


Both the modern pedals have reflectors, today a legal requirement for safety, whereas the R20 pedals do not. Now, this R20 pedal has a certain elegance, it's true, but it's also narrow. Uncomfortable over a length of time, especially in soft soled shoes, as your feet curl over it. The weights add another factor:

Pedal type g per pair
R20 651
MTB Flatties 336
Polymer Cage      286

I think it's remarkable that the old R20 pedals weigh so much, nearly 1.5lb! I discarded the polymer cage, for two reasons: the bearings on one were notchy and I didn't like the style for this bike. I thought it would be funky to have the MTB flatties. Apart from the beautiful wide platform they provide, the reflectors for safety and the weight saving (a stonking 315g), they are also shorter (12.1 cm v 11.0 cm from crank to pedal tip) and thinner, both of which reduce the chance of a pedal touching the road in a corner. So, my choice is made to switch to the MTB Flatties. 

That all sounds great, but then I tried fitting the MTB Flatties and to my surprise while the diameters were comparable (9/16"), the threading was different! I wondered whether the cranks had some old English threading, but that seems like an odd explanation, because I've managed to get modern pedals on a R20 before and know that others have too. More likely, perhaps the threading tooling that Raleigh used was slightly different to modern standard. It could be just some R20s that were like this. I tried a few pedals and I found that most of them were too tight, but one or two modern pedals went in ok, but only on one crank. Whatever the reason, after playing about a bit with modern pedals, I now feel that for this project, I will stick with the original pedals. They are a basic, but serviceable design. The end cap prises off carefully with a thin screwdriver. Underneath, two spring clips and a washer to remove:


There are no BBs just a plain bearing. The axle at the top simply slides into what looks like a tapered sleeve in the pedal, then the washer with flats is added and the two spring clips to hold it all down. This one was gummed up and a quick clean and regrease worked wonders. They spin super smoothly now. At least they are hardly worn and have plenty of service to give. They'll clean up ok and add to the retro look. 

Now consider the light bracket:


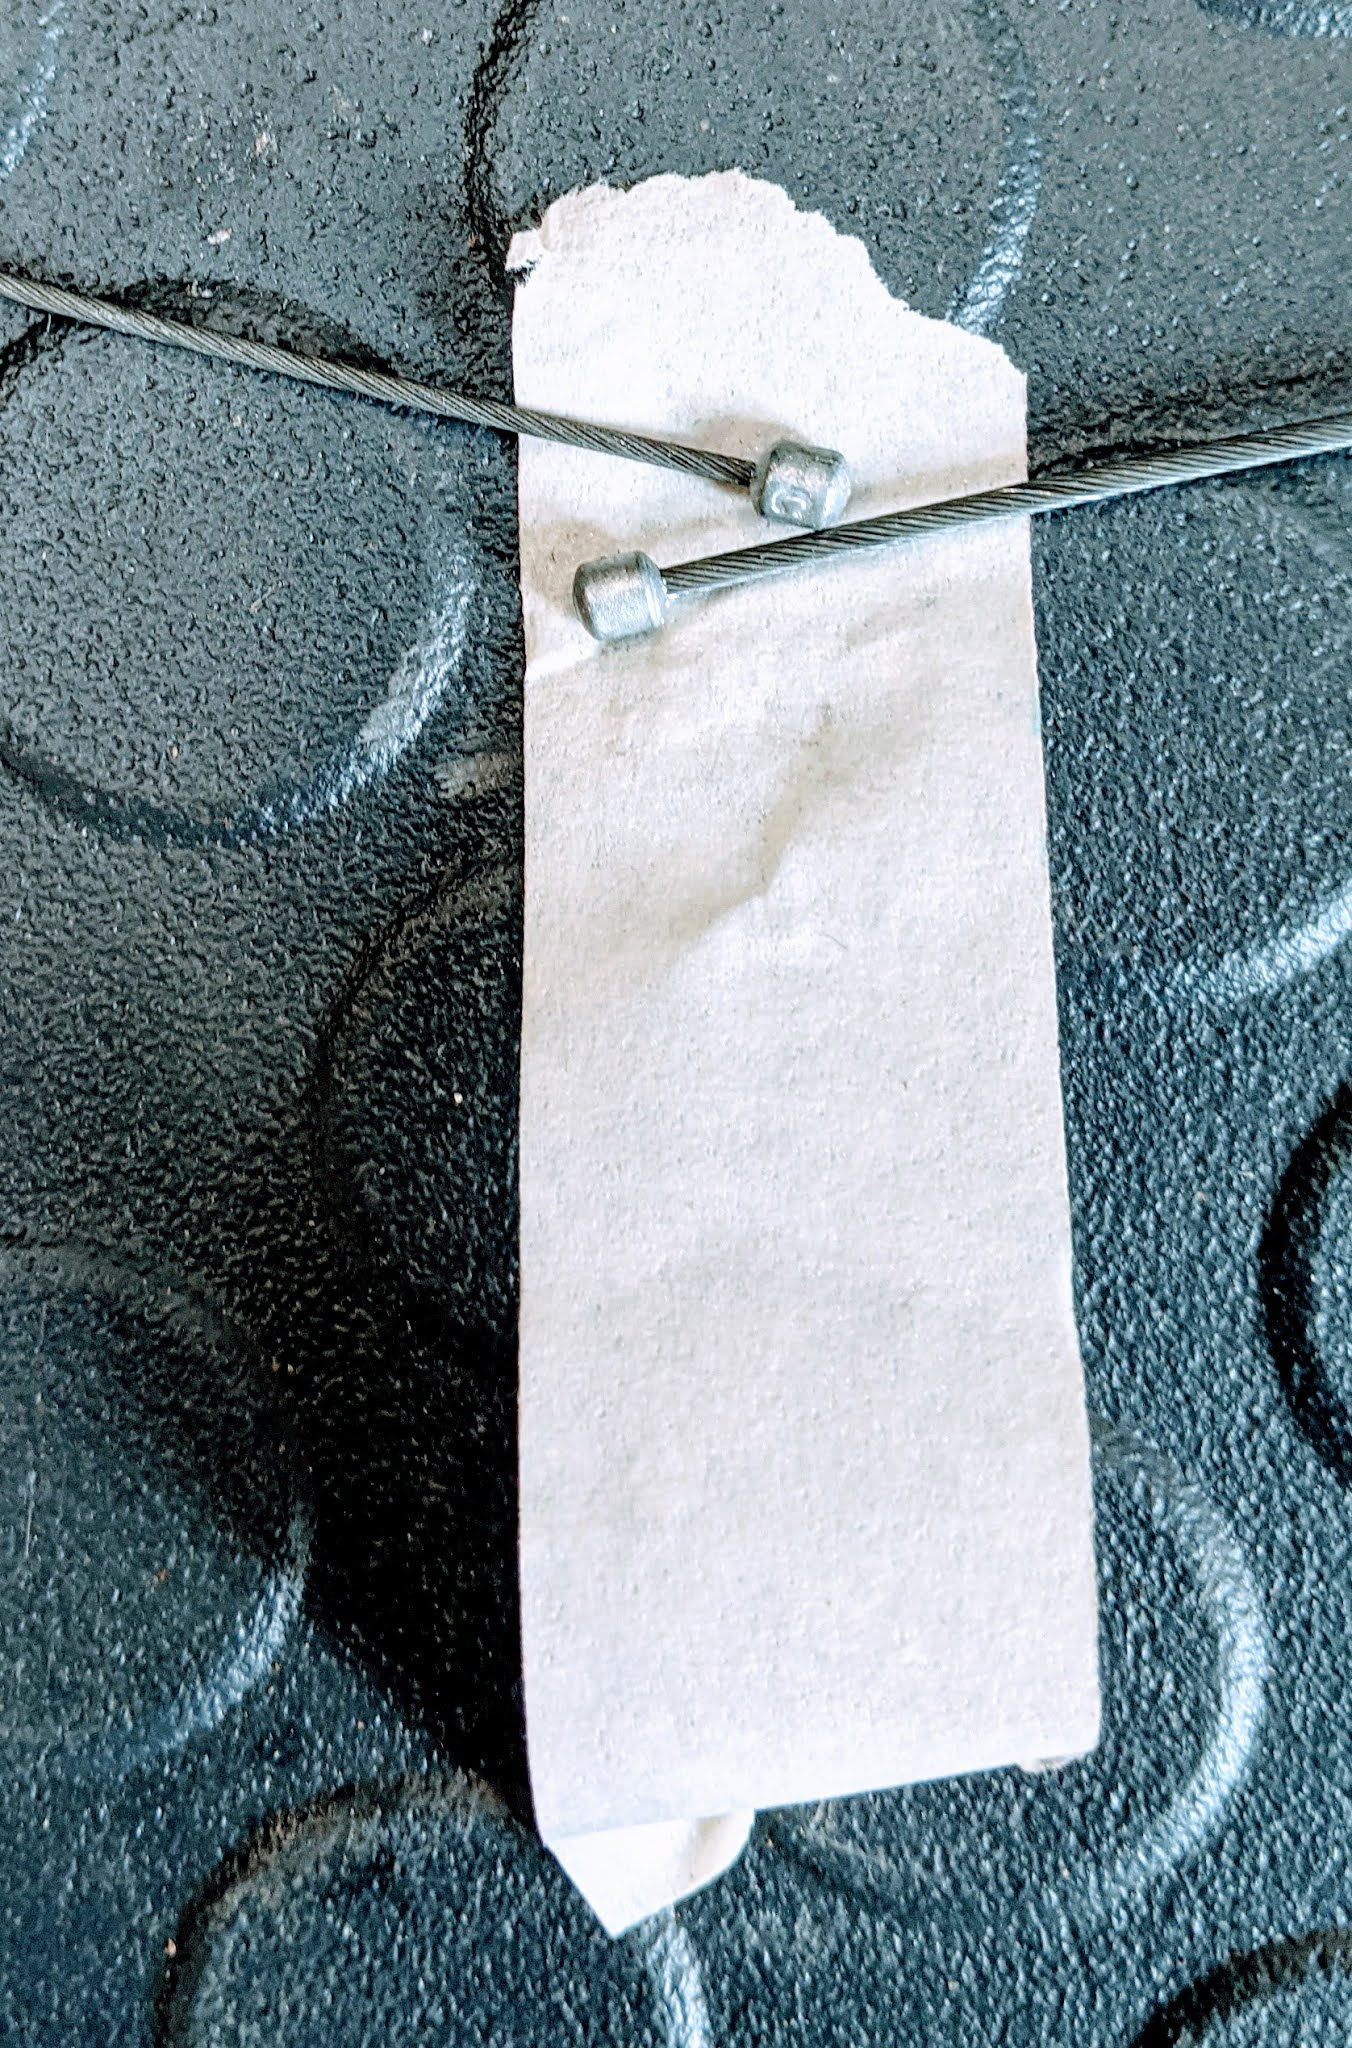
What an ugly lump that is, and given modern lights, it's redundant too. It serves a purpose in the headset, that is to increase stack height by a few mm in order to prevent the top lock nut from bottoming out. But that function can be easily achieved with a small standard spacer. How much does this monstrosity weigh? 77g! That's about the weight of SEVEN AAA batteries! Wowsers. Guess where that's going? Yes, in the recycling bin. NB, you have to remove the front brake caliper to get the stem out in order to lift this off the headset (see my post a few days ago on that wire loop thingy that restricts the movement of the stem vertically).

Note that by just by changing pedals and ditching the light bracket, you could save nearly 400g. Astonishing. 

You can repeat this thought process for every other item on the R20, using the factors I suggested at the top of this post (I'm not considering maintenance items, such as brake pads, tyres, BBs, chain and cables):

Sturmey Archer hubs (both the front one and the rear epicyclic AW gear unit): 
Elegant, well thought out, very functional, design kudos, unique, a bit heavy, but worth it! Pretty when clean and polished! I would keep these in nearly every case, unless there was a radically different vision for a particular build. 

Chainset: 
They are not all the same. Some patterns are indeed beautiful, others look more functional, but they have some eye appeal, I like the stamped "Nottingham Knight". They function well if you can deal with cotter pins and can live with the heavy chromed steel.

Bottom bracket:
It's perfectly functional, and isn't heavy, so in my view, this comes down to condition, and how important it is for you to change the chainset/eliminate cotter pins. The axle is a solid thing, and very rarely needs replacement. So, a good service with new BBs is usually all that's needed if you stick with cottered cranks. However, if you want to open up the world of square taper chainsets, then I believe that the simplest and best option is to find a square taper axle that fits and retain the same bottom bracket cups and 1/4" BBs. If that's not possible, then face the shell to 73mm or even 68mm (the width of my BSA 20 shell is 77mm as best as I could measure it), and rethread to standard 24 tpi. Some say that you should fill the threads with with a suitable molten metal before re-threading, but I've also read that many people have had success just rethreading directly, but slightly deeper than the original threads. Clearly a specialist's job. Failing any of those, then a problem solver may be a new threadless (friction fitting) unit. 

Saddle:
Really ugly, uncomfortable for me, and enormously heavy! It's gotta go. 

Seatpost:
Ugly, too short for many people, and very heavy, especially being steel with the steel clamp. Easy swap out to a modern one 28.6 usually. It's gotta go. 

Chrome steel Handlebars and Stem
Function ok, and have a certain elegance. However, they are really rather heavy and often this is were customisation and your personal vision take over. A quill stem, with alloy riser bars, or bullhorns, etc. 

Hand grips:
Yeuk! Hard ugly plastic and short. The only positive thing I can say about them is that they are hard wearing. But, I really think they have to go in just about any project (save for a restoration to original spec). 

Chrome steel rims:
Work ok, but do not brake as well as alloys, especially in the wet. Look nice when clean and polished up. Heavy! My front wheel without nuts, rim tapes, or tyres weighs 940g. With rim tapes, tyres and nuts it weighs 1547g. Go or stay? It's really one of preference and also considering the condition of the steel rims that you have, the hassle of doing a rim swap, or finding/building another wheel that fits and also brakes that work with them. On the other hand, if you're not accelerating and braking a lot then, a heavy wheel provides a nice flywheel effect for steady riding - which is what I tend to do on a Twenty. 

Nylon bushing top part of the headset: 
Functions just about adequately, especially if you get a chance to clean it and lube the surface that touches the steerer, and adjust the headset properly. Once the light bracket is off, there's not much in the weight. So this one is a matter of preference again. This photo is of my current project, rust cleaned off and polished. I've kept the Nylon bushing, but ditched the light bracket (hence the black spacer):


Another approach is to remove the Nylon bushing and install the top half of a 1" threadless headset. When I do that again in the future, I'll be sure to take enough photos and post them on this blog. 

Frame: 
It wouldn't be a Twenty without one! It's a classic, has got to stay.

Forks:
They are designed to fit the cone flanges of the Raleigh Sturmey Archer front hub and they work well enough. A bit heavy. I think this one is mainly down to whether you keep that front hub or not. Also whether you want to do something funky, like BMX forks for 451 or 406 wheels or suspension forks. In which case, you can also change the whole headset. 

Paintwork:
What condition is it in, and do you like it? Will it clean up nicely (after a wash, T-Cut and car polish)? Simple as that. 

Clamps and Locking levers on steerer and seat tube:
These function adequately if well-maintained and positioned properly (evenly over their respective tubing slots). They add a bit of weight, but also provide easy quick adjustment. Also, if you are fitting a quill stem, the front clamp becomes unnecessary and can go (or stay!). So it's really up to you. 

Brake caliper units:
Can function adequately if you take the time to set them up well, and they polish up ok too. Remove rust with WD40 and 0000 steel wool, chrome polish, lubricate and fix and adjust them properly. Use fresh cables. In many instances, I've changed only the inner wires, as the outer cables were fine. If the ends of the outer cables are kinked, you can snip off 5-10mm cleanly and that will improve the performance quite a bit. Modern alloy units would be an improvement and weigh less, but I think this one is really a matter of preference.  Here's a front caliper, with rust cleaned off one arm, but not yet the other one:


Brake levers:
In my view they function adequately, and being steel are better than plastic levers! But there are lighter and better modern alternatives. So, it's a matter of preference for your particular build I think. 

Mudguards (Fenders):
Functional, but do not have the break-off arms for safety as modern ones do and are relatively heavy. Must mount them properly and securely, or those beefy mounting arms could foul a wheel and cause a bad accident. I'm powder coating mine on this build.  

Chainguard:
Serves a function (keeping your trouser leg clean!) and has a certain appearance. Don't weigh a great deal, but grams are grams. It's up to you! I'm powder coating mine on this build.  

As I've said before, the Raleigh Twenty is like a blank canvas to a bike builder! The Raleigh bronze green BSA 20 that I'm working on at the moment is going to retain most of its original components, but with modern contact points (pedals, saddle/seatpost and hand grips). The next one may be a light weight with funky bars and alloy rims, but I haven't clearly figured out my direction on that one at this time.  

Go with your heart and desire, enjoy the process, and all will be ok. Be creative, be artistic! 

Wednesday 31 March 2021

Chuck's Tech Opinion: Shimano Uniglide cassettes, replacing cogs/sprockets

Just before Shimano came up with the Hyperglide (HG) cassette system that we know and love today, it introduced the Uniglide (UG) arrangement. It was an 1980s effort to provide not only a cassette system, but also teeth features to improve shifting (especially for the indexing 'click' that is pretty much standard now). I happen to have such a cassette in 6 speed - they were produced in 5, 6, 7 and 8 speed. Generally, UG cassettes are rare these days, while screw-on freewheel types remain relatively abundant. This post is about cleaning and re-jigging my Uniglide cassette, currently 13-14-15-17-19-21T, and my thoughts about it. I want to dismantle, clean and swap out one of the cogs to allow me to put in a bigger 24T. Photo before I started work:

Yes, it's dirty, and the grime is stuck hard! If you've never seen a Uniglide cassette before, then it could be confusing. It has neither Hyperglide's splined lockring nor the spline socket that screw-on freewheel types have. It does have a freehub body, much like the modern Hyperglide, but all the splines are the same width. Instead of the HG lockring, the topmost cog is screwed down on to the upper part of the freehub body, which is partially threaded, to hold everything together. The 24T cog that I want to add is the black one in the photo. To dismantle, you use 2 chain whips to hold the wider cog, while unscrewing the topmost cog (13T):


Thankfully it unscrewed fairly easily. Turned over, you can see the cutouts for weight reduction and the three small bolts that hold the unit together. The top locking cog (13T) has an inbuilt spacer and is threaded on its inside. 


View from the other side, there is a thin washer under the top locking cog (13T), and you can see the bolts engaged in the three small threaded holes in cog 14T:


The bolts need to come out. The bolts have a smooth shaft and are threaded at their tip. They screw only into the matching threaded holes in the 14T cog: 


Taking off the 14T cog, there are identical plastic spacers between the remaining cogs:


I cleaned up the parts and started to refit. In this photo you can see the threading on the upper part of the freehub body. Apparently, it's possible to change that body for a HG one, but why bother when this seems little worn and is functioning beautifully. Also, I think the threading on Dura Ace is different - presumably an attempt to keep it "exclusive" and apart from the mass market! I've placed the new 24T on first, then a plastic spacer:


Looking at the splines on 19T, note the absence of the wider notch and narrower notch. Also note the three holes for the bolts - these are present in everything, spacers, washer and cogs. I'm not going to use the bolts as their main purpose is to hold the cassette together for easy fitting. 


In the photo above, you can see two teeth features designed to improve shifting. Firstly, two opposing teeth on the 17T cog are shorter. These provide avenues for the chain to dismount as you shift. Secondly, you can just see the twist of all teeth. These features are the precursor of Hyperglide teeth shaping. Place cog, spacer, cog spacer, etc... until you reach the penultimate one, then the thin washer goes on:


Now you can clearly see the threading on the freehub body to take the last locking cog 13T. Put that last one on carefully by hand, to ensure threads are not crossed! Then tighten it with a chain whip, but it's not really necessary to strain yourself doing that, because the process of pedalling will tighten it. In fact, when I put it into top gear while riding, I felt the slight slip as it tightened into position. Here's a pic of the removed bolts and 14T cog, which I'll be putting away carefully in my bits box. Only some cogs had the shorter opposing teeth pairs:


The finished cassette. Not so dirty now! Can you spot the shorter teeth in the picture below? Hint: there are none in the top locking cog (13T). Notice that the 24T cog has them, which means it's not really intended to be a last cog - contrast with 21T (see photo above) which is stamped 'Low' and doesn't have the shorter teeth. I don't think it really matters, and presumably, having the shorter teeth on the biggest cog will help switching from 24T to 21T.  


Now a photo of the bike in which this wheel goes, my Dawes Impulse (see previous posts): 


And a closeup of the cleaned cassette newly configured to: 13-15-17-19-21-24T, with the vintage super-cool Shimano 105 mech:


One thing you need to check for is that the chain is long enough to handle cross-chained big-big. Even if you're not supposed to use that gear, it is wise to ensure that the chain is long enough for it to be engaged otherwise you can break things. To my relief, it was long enough.  

CHUCK'S TECH OPINION ON UNIGLIDE

I thoroughly enjoyed working on my Uniglide cassette, because the quality of manufacture is superb, and everything disassembles and fits well. It was easy to remove the bolts (using quality pliers). This is better than those annoying rivets in modern cassettes, but I can understand that rivets would be much cheaper than those three bolts when it comes to mass production. 

Test riding was magic! It shifted positively, flawlessly, and the indexing was spot on. Definitely the crispest shifting bike with down tube levers that I've ever owned and I'm comparing here to both screw-on freewheels and even more modern 9 speed Hyperglide hubs. (Perhaps that's because the tolerances, both cog-spacing and lever-indexing, for 6 speed are more forgiving compared to the narrower 9 speed?). 

Another great advantage is that the uniform spline widths allow you to invert each cog. Useful to maximise working life, as worn cogs may be simply turned around. While I like this and it resonates with today's re-use, up-cycle culture, it is not the ideal situation for the capitalist mass-producer who wants sales (think Apple iPhones and OS upgrades that render one's device slow). I think that is part of the reason why we have modern riveted cassettes and non-reversible cogs today.  Also, I suspect that with different width spacers, you may use the same freehub body to build up a 5, 7 or 8 speed cassette, but I haven't tried it and would have to research the standards for that (i.e. spacer widths, cog thicknesses and overall hub body height).  

In its time in the 1980s, Uniglide was top-end and a step-forward in smoothness of shifting and ease of indexation. I can appreciate why. Uniglide hubs are ultra-rare nowadays, so the information in this post is really for bike nuts, the sake of history, or those who accidentally come across one. Feel lucky if you do though because from what I've seen, a new old stock Uniglide cassette can sell for £60-£100!

Raleigh Twenty: To powder coat or not?

When I got this bike, it was dirty and grimy looking. My first thought was to strip the paint and get it powder coated. However, after working on it for a while, I realised that the parts with the worst paintwork (chips and rust) were the mudguards (fenders) and the chain guard. These have been removed and sent off to my local powder coaters for prepping and application of a contrasting colour. In the meantime, I washed the frame, applied T Cut to the paintwork, and have been working on polishing up and servicing the components (see last few blog posts on the chainset, bottom bracket and wheels). Today, for the first time, I whacked a bit of regular car polish on the underside of the frame and hey presto:


Not bad for paint that is 33y old, I think you'd agree! It vindicates my decision to not strip this frame. 


Now I'm keen to polish the rest of it, but there's a lot to do before that, such as removing rust from the brake calipers and levers, figuring out what I want for pedals and hand grips. In the photo, you can just see the 1970's cream plastic hand grip. Compared to modern bar grips, these are ugly, uncomfortable and undersized!  


Monday 29 March 2021

Raleigh Twenty: Front hub service, removing rust chrome wheels

The 46T 165mm crankset off the BSA 20 is utilitarian, but good looking, after the rust is removed and the chrome polished. I especially like the little "Nottingham Knight" stampings. Virtually unworn teeth:


OK, it's cottered, but I'll make sure to assemble it with anti-seize. I tried removing some rust with Aluminium foil and water, and while it works, it can cause scratches, probably because solid particles can get dragged about under the metal foil. I prefer using 0000 wire wool with WD40. That removes rust quickly and minimises scratching. Here are some before and after shots:

And another one:


In this one, the bottom part of the front hub has been cleaned, but not yet the top part. You can see the yucky grease solidified into varnish. Easily cleaned with WD40 and a small piece of green plastic scourer. This is probably the first time the hub has been opened since 1978! 


Note also the 3 cross spoke pattern, but interestingly, the crossing spoke goes over the first, second AND third spokes, not under the third, as is often the case on larger wheels with 3 cross lacing. And here's the other side, all clean, ready for balls (10 BB each side of 3/16"):

Like the chainset, there's a lot of character in these late 70s Raleigh Sturmey Archer front hubs. They are actually very well thought out in my opinion, as I'll describe further below. 


Here are the parts. Note that both cones have a small flange turned on them, but only one cone, the moveable one, has flats to make it a nut. That's because it is used to adjust bearing play - while the hub is on the bike! The other cone on the axle is intended to stay fixed - there's a stop on the axle to prevent it passing further along the thread. Note that neither cones have locking nuts (90mm across the outsides of the cones). 


You have to hand spring the front fork slightly opening the front dropouts a tad to let the flanges of each cone fit in. I measured my forks at 87mm across the insides, so that's a decent 3mm spring. Once in though, the hub will stay put, held by the cones, even before you put the nuts and washers on the outside of the forks. So, the clever bit is that you can adjust bearing play by sliding a cone spanner inside the fork on to the flats of the cone nut, and turning slightly. Once set, tighten the outside washers and axle nuts, and that holds it all down. Quite neat and clever and they run pretty smoothly (even this one despite the wear groove in the cone). Just remember to put the fixed cone on the right (drive side) of the bike, because on the other side, there will be a natural tendency for the bearing to tighten, which can be harmful to it. As an experiment, assemble and hold the axle ends in your hands, give the wheel a spin and fiddle about - it's easy to see the natural tendency of the bearing to tighten up when the fixed cone is on the left, and the natural tendency to loosen with the fixed cone on the right. But don't worry, they won't loosen in use, because the external nuts lock everything in position. 

For the inner tube side surface of the rims, I simply spray a bit of WD40, brass wire brush and then a quick going over with a slightly coarser steel wool. Wipe it off with a small cotton bath towel, and hey presto, clean insides ready for rim tape. For the Sturmey Archer AW I merely oiled it using a cheap plastic pipette and 1:3 mix of car transmission fluid to 5W engine oil. The pipette allows a small measure to be squirted easily into the oil port. That three speed tickety tick! As they say, AW stands for Always Works...


So here they are, shiny chrome wheels, and hubs, bling bling! After a bit more tightening and truing, I'll dress them in new white-wall shoes. 

Wednesday 24 March 2021

Raleigh Twenty Steerer Restrictions and Bottom Bracket

There are two mechanical restrictions on the steerer assembly of the Raleigh Twenty, here, a BSA 20. 

VERTICAL RESTRICTION

As promised in an earlier post, here's a photo underneath the steerer, looking between the front forks: 

You can see the wire wrapped around the main brake bolt. The wire also attaches to the stem:


The wire could be copper or some kind of bronze. Here's a close up of wire twisted up around a pin in the stem:

The wire's function is to prevent the stem from being completely pulled out of the steerer tube. At the top of the first photo at the start of this blog post, you can see the bent plate chromed bracket on the brake bolt, sitting snug against the front of the forks. 

ROTATIONAL RESTRICTION

Here is another view of that bracket, this time from above:

If you don't know what the bracket's for, then you may think it to be some kind of "English decorative curio", or a basket attachment! But I hope this picture helps you to understand the function of the odd shaped bracket. As the handlebars are turned, the bracket "folded hands" hits the metal welded C shape plate behind the head tube. So, the steerer stop bracket and that welded C shape plate on the back of the headtube together provide a mechanical restriction to the range of movement of the forks. 

I believe that both of these steerer restrictions were intended as safety features, but I'm not certain of that.

CRANK REMOVAL & BOTTOM BRACKET SERVICE

I also took off the cranks for servicing the bottom bracket. The non-drive side cotter pin came off easily. But the drive side one was stuck like a pig. Removing a seized cotter pin has got to be my most unfavourite bike mechanic job! I had to drill it out, and it was a real struggle. Here is the first pilot hole: 

You've got to use something as cutting fluid (I used 3in1 oil). I then followed up with wider diameter drills and finally after much hammer dynamics, got the *#*£$@! out (one day later!). 

And I finish with some photos of the BB shell, axle and cups, apart and reassembled. The axle is 14.2cm long, and measures about 6cm between cones. There are 11 balls of 1/4" on each side. It's clear that this bike was not much used, which makes it a great candidate for a clean up and service. Restoration using as many of the original parts as possible.


I think the drive side cup is welded in - in any case, I didn't bother trying to remove it. Now I just need to find some new cotter pins, which as far as I can tell are 3/8" in diameter. Whether or not it's considered right, I WILL use some copper anti-seize when I fit them. 

Wednesday 17 March 2021

Servicing a Raleigh Twenty 20 Headset: Nylon Bushing, Crazy Design?!

The headset arrangement on a Raleigh 20 is a little bonkers in my view. The bottom part is a conventional ball bearing race, and really quite good. The top half is the bottom half's Frankenstein brother. In this sequence of photos I'll show you details, as I open up this BSA 20 for inspection, cleaning and lubrication. (For replacing the top part, see this previous post). Here's the front view:

Now remember that the stem has restricted vertical movement in the steerer, because of a wire loop tie inside at its foot. I don't have a photo of that here, but when I get the wheels and mudguard off next, I'll try to take some pictures. For now, note that the stem can be lifted up a little, but cannot be taken out. Below is a pic of the top part of the headset. From the top: stem, top lock nut, light bracket, second lock nut (hidden by the light bracket), stem-steerer clamp, and a metal top cap:

So, straight away you can see that the clamp squashes between the lock nuts above it and the head tube bearing below it. This is a less than ideal situation for good bearing preload. Let's open up from the top:

With the nut off and light bracket lifted, you can see the second lock nut properly. Unscrew that second lock nut and raise the parts: 

I've taken off the clamp lever in the photo above. Note that the bolt has a square flange and can be removed to allow the clamp to lift up easily over the threads. You can see the metal top cap has indentations on its lid. That's what I mean by not ideal for bearing preload - the clamp interferes with the even downward force of the lock nuts. And beneath, you can see the top edge of the infamous nylon bushing. How does the clamp join the stem to the steerer tube I hear you ask? Well, because of this cut out


You can see how the clamp edges push on the sides of the T shaped cut to press the steerer on to the stem tube. Obviously, the designer was trying to deal with how to raise and lower a stem without having to deal with expander bolts as in a regular quill stem. It just about works, but I would not describe it as an elegant solution! This time, I was not replacing the top bearing, merely inspecting, cleaning and lubricating. I used a drop of thick gearbox oil around the inside of the nylon bushing to help the steerer tube rotate inside it. Don't put too much in there, because you need the stem to clamp to the steerer and excess lube might mess that up.

Finally, I serviced the bottom race, which is fiddly without taking the stem out, but can be done. Just make sure you have a sheet on the floor to catch any loose ball bearings when you first lift it up. When I did that, the ball race was dry, with a bit of hard stuck grime on the race that needed to be removed. Below, is a photo of the bottom bearing opened up, the 25 balls of 5/32" removed, cleaned, greased up ready for the shiny balls to be placed on the lubed cup. 

The bottom cup is pretty chunky as you can see, and merely sits on the fork crown. In this example it was not a tight friction fit, as compared to a regular crown race on a typical fork. 

In a previous post (search on Raleigh Twenty Project) I showed some pictures of the headset replacement that I did on a blue Triumph Trafficmaster 20.  Although I kept good photos of the nylon bushing and bottom race, I didn't make a thorough a photo record of how I fitted the 1" threadless top bearing. So when I do the next one, I'll take more photos of how to get rid of that nylon bushing and replace it with proper bearings.

This time, though, I was only inspecting, cleaning and lubing. It was enough to improve the steering of this particular "shopper bike". While it's better than before, I know it can be improved a lot more, but that would require this stem to be untied from its base, chucking the clamp, fitting a new quill stem, which probably means new handlebars, etc. By the way, another approach is to completely replace the forks and headset (the head tube diameter is relatively conventional traditional size). 

However, my plan for this bike is not really modernisation, but rather rejuvenation with judicious restoration. Which is what working on this cycle and riding it gives me a bit of!