The 46T 165mm crankset off the BSA 20 is utilitarian, but good looking, after the rust is removed and the chrome polished. I especially like the little "Nottingham Knight" stampings. Virtually unworn teeth:
OK, it's cottered, but I'll make sure to assemble it with anti-seize. I tried removing some rust with Aluminium foil and water, and while it works, it can cause scratches, probably because solid particles can get dragged about under the metal foil. I prefer using 0000 wire wool with WD40. That removes rust quickly and minimises scratching. Here are some before and after shots:
And another one:
In this one, the bottom part of the front hub has been cleaned, but not yet the top part. You can see the yucky grease solidified into varnish. Easily cleaned with WD40 and a small piece of green plastic scourer. This is probably the first time the hub has been opened since 1978!
Note also the 3 cross spoke pattern, but interestingly, the crossing spoke goes over the first, second AND third spokes, not under the third, as is often the case on larger wheels with 3 cross lacing. And here's the other side, all clean, ready for balls (10 BB each side of 3/16"):
Like the chainset, there's a lot of character in these late 70s Raleigh Sturmey Archer front hubs. They are actually very well thought out in my opinion, as I'll describe further below.
Here are the parts. Note that both cones have a small flange turned on them, but only one cone, the moveable one, has flats to make it a nut. That's because it is used to adjust bearing play - while the hub is on the bike! The other cone on the axle is intended to stay fixed - there's a stop on the axle to prevent it passing further along the thread. Note that neither cones have locking nuts (90mm across the outsides of the cones).
You have to hand spring the front fork slightly opening the front dropouts a tad to let the flanges of each cone fit in. I measured my forks at 87mm across the insides, so that's a decent 3mm spring. Once in though, the hub will stay put, held by the cones, even before you put the nuts and washers on the outside of the forks. So, the clever bit is that you can adjust bearing play by sliding a cone spanner inside the fork on to the flats of the cone nut, and turning slightly. Once set, tighten the outside washers and axle nuts, and that holds it all down. Quite neat and clever and they run pretty smoothly (even this one despite the wear groove in the cone). Just remember to put the fixed cone on the right (drive side) of the bike, because on the other side, there will be a natural tendency for the bearing to tighten, which can be harmful to it. As an experiment, assemble and hold the axle ends in your hands, give the wheel a spin and fiddle about - it's easy to see the natural tendency of the bearing to tighten up when the fixed cone is on the left, and the natural tendency to loosen with the fixed cone on the right. But don't worry, they won't loosen in use, because the external nuts lock everything in position.
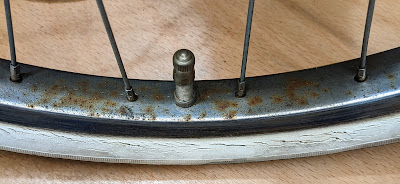
For the inner tube side surface of the rims, I simply spray a bit of WD40, brass wire brush and then a quick going over with a slightly coarser steel wool. Wipe it off with a small cotton bath towel, and hey presto, clean insides ready for rim tape. For the Sturmey Archer AW I merely oiled it using a cheap plastic pipette and 1:3 mix of car transmission fluid to 5W engine oil. The pipette allows a small measure to be squirted easily into the oil port. That three speed tickety tick! As they say, AW stands for Always Works...
So here they are, shiny chrome wheels, and hubs, bling bling! After a bit more tightening and truing, I'll dress them in new white-wall shoes.


Great post! The Raleigh Twenty is such a classic, and it's fantastic to see detailed guides like this keeping these vintage bikes on the road. Your explanation of the front hub service was spot on—clear and easy to follow. It reminded me I’ve got a few old projects piling up in the shed. Might be time to clear a few out, and I’ve been looking into cash for cars Adelaide SA options to help make room. Cheers for the inspo and the solid advice!
ReplyDelete